|
|

Print Settings for Diagram Dialog |

|

|

|
||
Print Settings for Diagram Dialog |
|
|
|

|
|
|
Print Settings for Diagram Dialog |
|
|
|
||
Print Settings for Diagram Dialog |
|
|
|
|
|
|
||
When a diagram is active and Print > Page Setup is selected from the Application menu, the Print Settings for Diagram dialog is opened. The Print Settings for Diagram dialog contains three pages: General, Header and Footer and Margins.
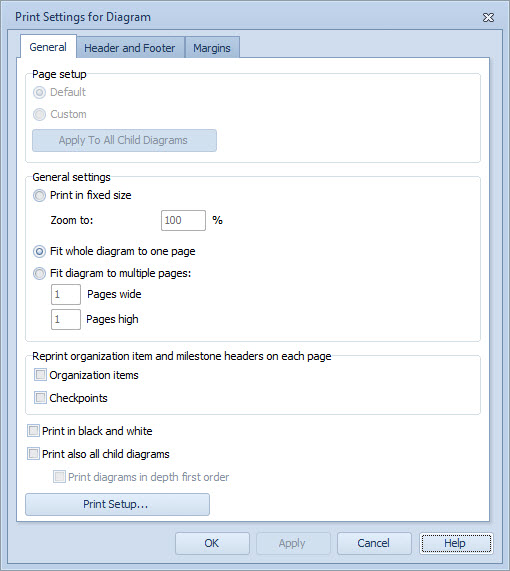
General page of the Print Settings for Diagram dialog
In the Page setup group of the General page it is possible to define the page setup mode. The page setup settings can be defined for all diagrams separately. For each diagram it is possible to specify whether default settings or custom settings are used. However, if you enter the Print Settings for Diagram dialog from the Application Menu by selecting Print ![]() Page Setup, you can only make changes to the default settings. If you enter the dialog from the context menu in the Diagram view or from the Print Preview dialog, you can select the Custom option for the page setup and thus define customized print settings for the selected diagram.
Page Setup, you can only make changes to the default settings. If you enter the dialog from the context menu in the Diagram view or from the Print Preview dialog, you can select the Custom option for the page setup and thus define customized print settings for the selected diagram.
If you want to apply the current settings in the dialog not only to the current diagram but also to all its child levels, click the Apply To All Child Diagrams button. The button is disabled when modifying default settings.
In the General settings group, you can set the diagram zoom size before it is printed. You can also specify if you want the whole diagram to fit to one page or spanned over a specified number of pages, height-wise and width-wise.
In the Reprint organization item and milestone headers on each page group, you can define whether you want to reprint organization item and/or milestone headers on each page. If you select the Organization items option, the organization unit names are reprinted on each page on the left-hand side in horizontal modeling and on top of the page in vertical modeling. If you select the Checkpoints option, the checkpoint names are reprinted on each page on top of the page in horizontal modeling and on the left hand side in vertical modeling.
If you want to print in black and white, select the Print in black and white option. You can also select to print all of the child diagrams of the current diagram by selecting the Print also all child diagrams, so that you do not have to select and print each child diagram individually. Additionally, you can select Print diagrams in depth first order, in which case each diagram branch is traversed through before moving to the next diagram branch. To define printer properties, select the Print Setup... button.
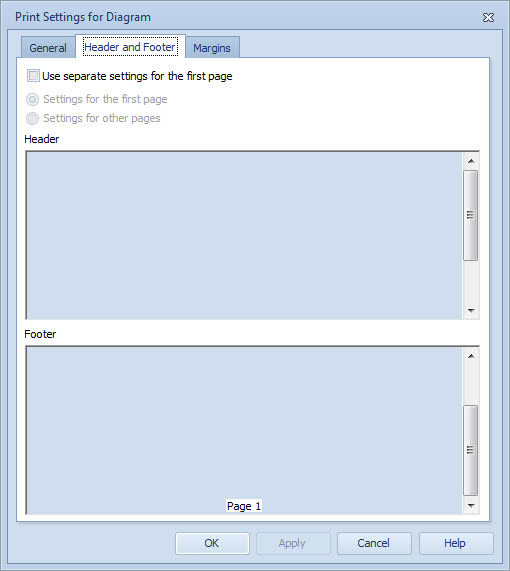
Header and Footer page of the Print Settings for Diagram dialog
In the Header and Footer page you can specify what all has to be included for the pages printed. These specifications for headers and footers can be specified as separate for the first page and for the rest of the pages by selecting or deselecting the "Use separate settings for the first page" checkbox.
Note that if you have selected "Print also all child diagrams" on the General page and you then select the "Use separate settings for the first page" checkbox, the first page settings will be used for the first page of each subprocess. However, this does not affect page numbering so when a new subprocess is printed, the numbering does not start from 1 but continues from the previous page.
You can include the following in the header and footer of the pages printed:
•Model Name
•Diagram Name
•Version
•Status
•Printing Time
•Model Creation Time
•Last Saving Time
•Page Number
•Free Text
To include any or all the above in the model just go to the headers or footers area in the Headers and Footers dialog and right-click to bring up a pop-up menu from which you can select the item to include. The same operation can also be performed with a left-click.
If you selected to insert free text, a new dialog opens where you can freely type the text you want to appear in the header or the footer. After typing the text, click OK. To edit the text later on, right-click or left-click on the text and select Edit... to open the Edit Text dialog. Click OK to save the changes you made.
Each of the elements you can insert as the header or footer can be deleted by right-clicking or left-clicking on the item to be deleted and selecting Delete from the pop-up menu.
To change the character format of the elements included in either the header or footer, right-click or left-click on the specific item and choose Change Font. This will bring up the Change Font dialog, where you can select the various format properties like font size, type etc.
You can position each of these elements to the left, right or center of the page by right or left clicking on the element to be positioned and selecting Position from the pop-up menu, and selecting left, right or center from the following pop-up menu.
You can reshuffle the vertical order of either of these elements by choosing the Move Upwards or Move Downwards items from the pop-up menu brought up by right or left clicking the element to be moved up or down, as the case may be. The margins can be set in the Margins page of the print setup dialog.
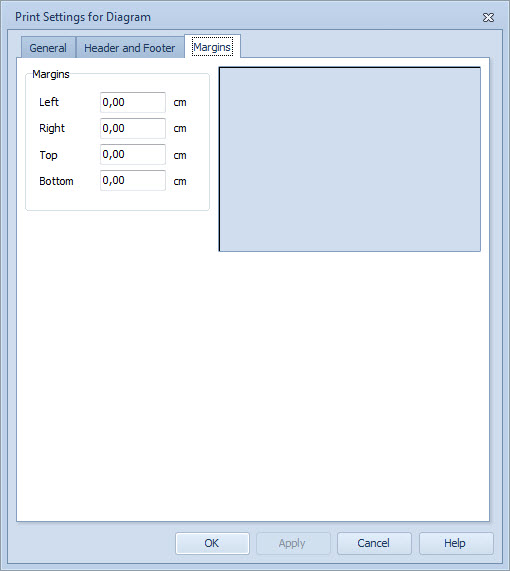
Margins page of the Print Settings for Diagram dialog
To preview the current settings, click the Apply button located at the bottom of the dialog, and when you want to save the settings, click the OK button. To cancel any changes you have made, click the Cancel button. This will restore the previously saved settings and revert all the changes which you may have set temporarily with the Apply button.