|
|

Indicator Configuration Window |

|

|

|
||
Indicator Configuration Window |
|
|
|

|
|
|
Indicator Configuration Window |
|
|
|
||
Indicator Configuration Window |
|
|
|
|
|
|
||
The appearance of the indicator can be modified in the Indicator Configuration window.
From the Graph tab of the Element Properties window, the Indicator Configuration window can be opened in either of the following ways:
•Double-click the indicator.
| OR |
•Right-click the indicator and select the Indicator Properties... option from the pop-up menu.
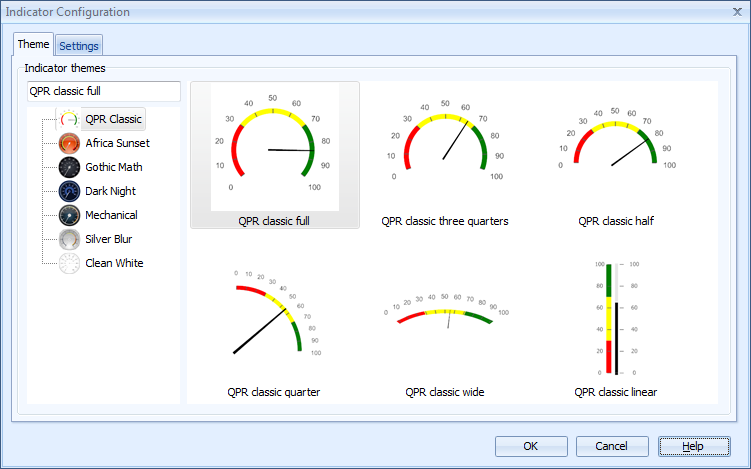
Theme
On the Theme tab, you can select the indicator by first selecting a theme from the left frame of the window, and then selecting an indicator type from the right frame.
Settings
The options on the Settings tab allow you to define the scale, the tick marks, and the direction of the scale, as well as toggle the visibility of the value and the period of the measure.
Scale
•Scale minimum/maximum. By selecting the 'Automatic' check box, you can have the minimum and/or the maximum end of the indicator scale to be set automatically based on the values of the element. When the 'Automatic' check box is unselected, the values can be entered into the fields to define the minimum and maximum of the indicator scale.
Ticks
You can define the tick marks in two ways:
Number of ticks
•Major ticks/Minor ticks. Specify the number of ticks in these fields. The specified number of major ticks is placed evenly on the gauge, and the minor ticks amount is the number of minor ticks between two major ticks. You can also set both of these to 0, in which case the tick marks are not shown.
•Adjust ticks automatically. If this option is selected, the ticks are handled automatically and the gauge may not necessarily use the desired number of ticks.
Distance between ticks
•Between major/minor ticks. Specify the distance between minor and major ticks. The minor distance must be smaller than the major one, and it must fit evenly in the major one. The first major tick is placed in the beginning of the scale and the next ticks according to the minor tick value. You can also set both of these to 0, in which case the tick marks are not shown.
Font. Click this button to define the font used in the indicator.
Direction
•Descending scale/Ascending scale. Select the direction of the scale used in the indicator.
Value and Period
•Show value and period. Select this check box if you want to show a text box containing the value and the unit, the measure name, the series name, and the period name below the indicator.