|
|

Value Settings Window |

|

|

|
||
Value Settings Window |
|
|
|

|
|
|
Value Settings Window |
|
|
|
||
Value Settings Window |
|
|
|
|
|
|
||
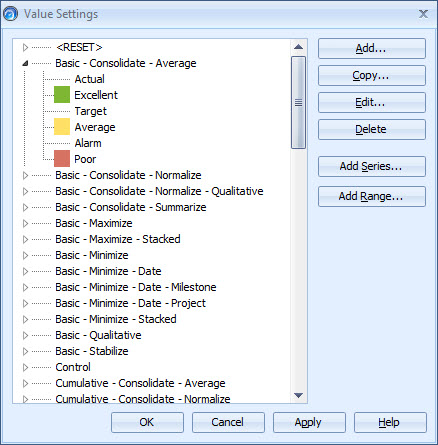
In the Value Settings window you can add, copy, edit, and delete value settings and series, as well as add, edit and delete ranges.
To open the Value Settings window, click the ![]() Value Settings button on the Model tab of the ribbon.
Value Settings button on the Model tab of the ribbon.
Adding New Value Settings
To add new value settings:
| 1. | Click the Add... button to open the Value Settings Properties window. |
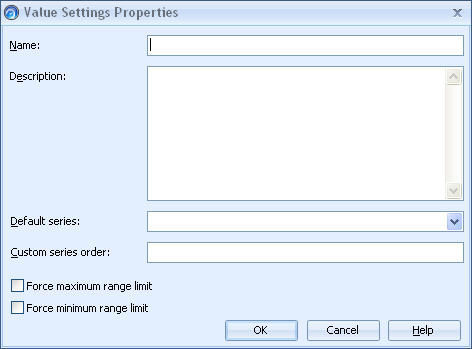 |
| 2. | Type a name for the value settings in the Name field. |
| 3. | Type a description (optional) for the value settings in the Description field. |
| 4. | Select the series which will act as the Default series in these value settings. As the default series is the most commonly used series of the element, it should be the series that has the most important values of the element. |
Note: The default series can only be selected if you have already defined one or more series for these value settings. If you do not have any series defined yet, you can edit these value settings later on when you do have series defined.
| 5. | You can modify the order of the series shown in QPR Portal by entering the order for the columns in the Custom series order field. Type in the identifiers for the series separated by commas. For example, if you enter "ACT, TAR" (which have been defined as the identifiers for the "Actual" and "Target" series in the Series Properties window), the series columns for the "Actual" and "Target" series are shown in the Details mode of the Element view in QPR Portal in this particular order. If you want to hide some series columns, you can just leave the series identifier out from the list. Note that a series can be listed only once or not at all. If no order is defined in the Custom series order field, or the syntax in the list of identifiers is incorrect, the default order is used. |
| 6. | Select a Force maximum range limit or Force minimum range limit for the value settings by selecting the appropriate check box. These options restrict the values that can be entered. Otherwise the range of values is not restricted. The "Force maximum range limit" option restricts the highest values that can be input to the upper limit of the highest range of the value setting, i.e. in the case of using for instance value settings with 5 ranges when enabling this option, values cannot exceed the upper limit of the highest range. Similarly, when the "Force minimum range limit" option has been enabled, values cannot be lower than the lower limit of the lowest range. Note that existing values that are located outside the limits when enabling the options are left intact, but new values that violate the limits cannot be input. |
| 6. | Click OK. The value settings are added to the list in the Value Settings window. |
Copying Value Settings and Series
It is possible to copy value settings and series from a non-archived model in the database. To copy value settings or series:
| 1. | Click the Copy... button. |
| 2. | Select the desired value settings or series from the window that opens and click OK. |
| 3. | If there was an existing value setting or series with an identical name, the copied value setting will have an incremental number added to the name. In this case, you can rename the copied value setting or series by selecting it and pressing the F2 key. |
| 4. | Click OK in the Value Settings window to apply the changes. |
Editing Value Settings
To edit value settings:
| 1. | Select the value settings you want to edit from the list in the Value Settings window. |
| 2. | Click the Edit... button. The Value Settings Properties window opens. You can open the editing view also by double-clicking the desired value setting on the list. |
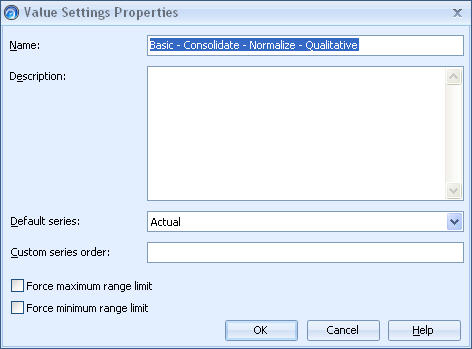 |
| 3. | Edit the settings you want to change and click OK. The new settings are saved in the database. |
Deleting Value Settings
To delete value settings, select the value settings and click the Delete... button or press the Delete key. A confirmation dialog appears. Click Yes to confirm the deletion.
Adding, Editing and Deleting Series
See Working with Series.
Adding, Editing and Deleting Ranges