|
|

Page One |

|

|

|
||
Page One |
|
|
|

|
|
|
Page One |
|
|
|
||
Page One |
|
|
|
|
|
|
||
Fast Guide to QPR Modeling Client This guide provides you with a quick overview to the most relevant functionality related to process modeling with QPR Modeling Client.
Starting QPR Modeling Client and Logging In Start QPR Modeling Client by selecting Start Menu -> All Programs -> QPR Suite 2017 Clients -> QPR EnterpriseArchitect/QPR ProcessDesigner.
You can log in to the QPR BizArchitecture Server by entering your username and password to the fields on the ‘Login to QPR BizArchitecture Server’ dialog.
Usually the login is done with your Windows credentials. The default user for all QPR products is ‘qpr’ and the password is ‘demo’. Alternatively, you can click Cancel to work offline.
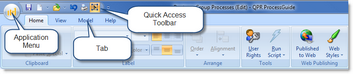
You can define the server connection settings in the Server Connections dialog accessible from Application Menu -> QPR EnterpriseArchitecture / ProcessDesigner Options -> Connections… The Ribbon and the Application Menu The ribbon in QPR Modeling Client contains controls for the commands used in modeling. The controls are grouped into sets of tabs that keep them readily available in the user interface. To switch to a certain tab, simply click on the name of the tab. To execute a command, click on the relevant button on the ribbon.
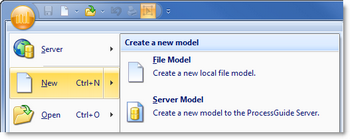
The Application Menu can be opened by clicking the Creating a New Model To create a new model, either click the |
|
model in the Application Menu. You can then select to create the new model based on a template, e.g. the Basic Process Modeling Template (Color), or a base model if one is available.
Opening and Saving a Model You can open an existing model either by clicking the
To save a model, click the
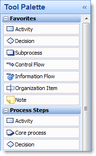
The Tool Palette The Tool Palette is located on the right side of the Flow Chart view. It consists of drawing tools divided into categories.
Creating Elements on the Flow Chart To draw elements on the flow chart, click on a drawing tool on the Tool Palette and then click on the flow chart. Alternatively, you can drag and drop an element from the Tool Palette on the flow chart.
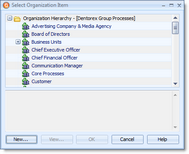
Organization Items To create an Organization Item, drag and drop it from the Tool Palette to the flow chart. If an Organization Item exists already, you can choose to use an existing one from the dialog that opens, or you can click the New button to create a new Organization Item. |
|
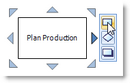
Process Steps Process Steps can be created by clicking on a corresponding drawing tool on the Tool Palette and then clicking on the flow chart. Another way to create Process Steps is to use Quick Modeling Hotspots. This has the added benefit, that the new Process Step is automatically connected to the previous one by a flow. To create a Process Step by using Quick Modeling Hotspots, hover the mouse over a Process Step to show the hotspots, then move the mouse over a hotspot and select the Process Step type to be created.
After clicking the Process Step type, QPR Modeling Client will create a new Process Step in the direction of the hotspot arrow and a flow connecting the two Process Steps. The Quick Modeling functionality can be toggled on or off by pressing the F4 key.
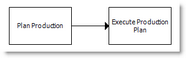
Flows and Connectors To create a flow or a connector, select one of the Flow or Connector tools from the Tool Palette, and then click the starting point and then the ending point for the flow or connector.
Subprocesses A subprocess is a process step with a process level under it. They can be used to create hierarchical process models. Subprocesses can be created in two ways. The first way is the top to bottom approach, where you create the subprocess element like any other process step and then go to the subprocess level to model the subprocess content itself. |