QPR Knowledge Base 2019.1
It is possible to use single sign-on authentication with QPR products. QPR Portal, QPR Web Services Foundation, QPR Modeling Client, and QPR Metrics client support the use of Integrated Windows Authentication (IWA) for login. In addition, generic single sign on (SSO) is available for QPR Portal. With QPR Portal only Microsoft Internet Information Services (IIS) is supported as a web server. See the instructions below for information on enabling single sign-on authentication:
Changes in QPR Configuration Manager
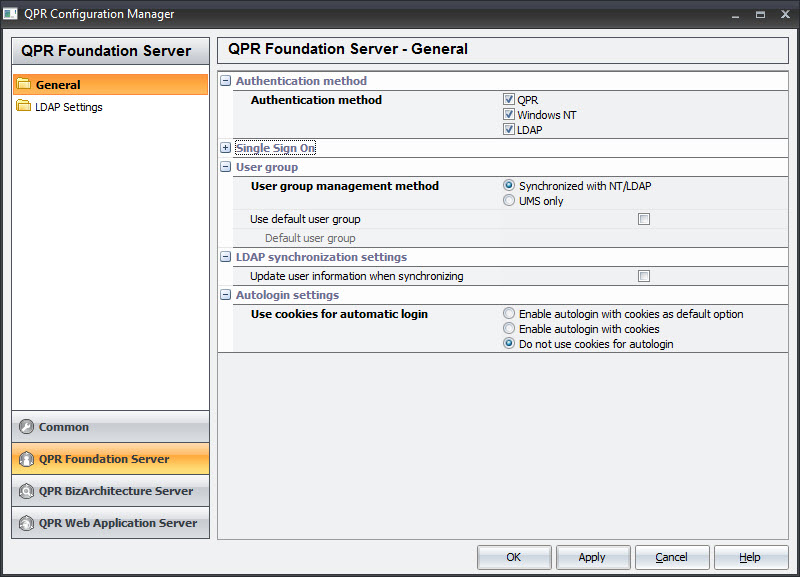
1. Change the following settings in the General tab of the QPR Foundation Server section:
Select the authentication method(s) you want to use in the "Authentication method" sub-section. In the case you are going to use Integrated Windows Authentication with LDAP authentication, make sure Active Directory is set as the naming convention for LDAP (this can be done in the LDAP Settings sub-section). Check also that cookies are not used for autologin, i.e. the "Do not use cookies for autologin" option is selected in the "Autologin settings" sub-section. Select also the desired group management method from the "User group" section. See the previous two chapters for more information about the user group management methods.

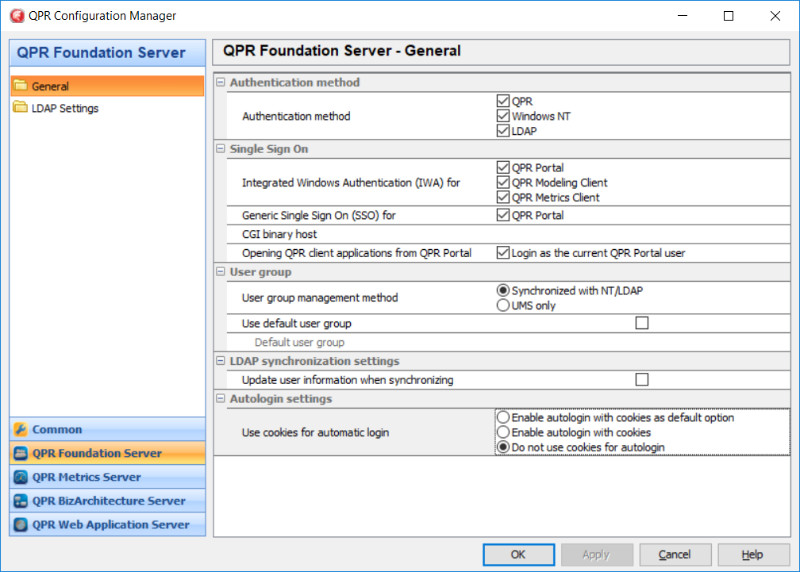
2. Change the following settings in the Single Sign On sub-section of the QPR Foundation Server section:
Select the products for which you want to enable Integrated Windows Authentication (IWA) or generic Single Sign On (SSO) by checking the desired checkboxes. In the case you selected QPR Portal in either section and QPR Web Application Server is located on a different computer than QPR.isapi.dll/QPR.CGI.exe, define also the IP address or hostname of the server computer containing QPR.isapi.dll/QPR.CGI.exe into the CGI binary host field in the General Settings section. If QPR.isapi.dll/QPR.CGI.exe and QPR Web Application Server are located on the same computer, the CGI binary host field can be left empty.

The Single Sign On (SSO) option enables you to use single sign on in trusted environments where a web request's header variable carries the login name of the authenticated user. In the case your portal environment supports setting header variables for authenticated users, you can utilize the generic single sign on support for authenticating to QPR Portal. This functionality enables integration for example with the SAP Logon Ticket system.
Using the SSO option requires also that qprsettings.dat in the CGI binary/ISAPI DLL folder (C:\Inetpub\wwwroot\qpr2019-1\Portal by default) is modified to define the name of the header variable containing the login name. Add a HDR_VAR_USR = <variable name> setting to the file. Note that it's not recommended to have underscores in this variable name since web servers have special handling for them. For example Apache silently drops underscores and IIS translates them to dashes.
Check log on account for QPR service
3. Make sure that QPR Service 2019.1 is run with an account that can make queries to Active Directory.
Restart QPR service
4. Start/restart QPR service so that changes take effect.
Check Microsoft Internet Information Services (IIS) settings
5. The following applies regardless of IIS version:
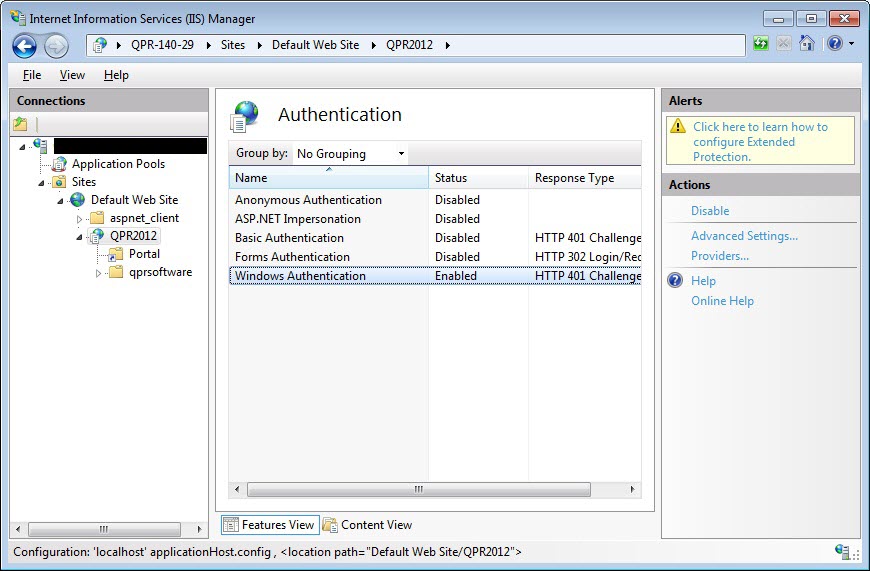
•Anonymous access needs to be disabled and Windows Authentication enabled on the QPR2019-1 application / virtual directory and Portal virtual directory
On IIS 7 and newer, also make sure that the Windows Authentication feature is installed on IIS.

See Appendix D in the QPR Installation Instructions document for information about configuring QPR Web Services Foundation to use single sign-on.
Web browser settings in Microsoft Internet Explorer
Microsoft Internet Explorer supports Integrated Windows Authentication in its default configuration.
Web browser settings in Mozilla Firefox
To enable Integrated Windows Authentication in Mozilla Firefox, do the following:
1.Input about:config to the address bar
2.Acknowledge the warning and proceed
3.Input network.automatic as the filter
4.Double-click the network.automatic-ntlm-auth.trusted-uris setting.
5.Input the host name of your QPR Portal as the value, for example http://myserver. If you have multiple servers to allow, separate them with commas.
Adding Generic Single Sign-On Authorized Users to QPR User Management System
If you want to add users authenticated via generic SSO to the QPR User Management System as users, do the following:
1.In addition to the HDR_VAR_USR variable in the qprsettings.dat file (see above), you can define also the user's full name with the HDR_VAR_FULLNAME and the user's e-mail address with the HDR_VAR_EMAIL variables. Note that the data used with these variables has to be UTF-8 encoded or non-ASCII characters URL encoded.
2.In the QPR Configuration Manager, make sure that the "Generic Single Sign On" setting is enabled in the General settings section for the QPR Foundation Server.
3.Likewise, make sure that the User group management method is set to "UMS only". If this is not set, the authenticated user is created to the User Management System, but it is not added to any group. This may result in the user not having access rights if individual access rights for the user are not set.
4.Select "Use default user group", define the "Default user group name", and make sure that this group actually exists. If it doesn't exist, the authenticated user is created to the User Management System, but it is not added to any group. This may result in the user not having access rights if individual access rights for the user are not set.
5.In the QPR_Servers.ini located in the C:\ProgramData\QPR Software\QPR 2019\2019.1\Servers\Settings\<possible instance folder>, set the UserGroupManagementWithSSO value to 1.
Opening QPR Client applications from QPR Portal
If you want to start QPR Metrics or QPR ProcessDesigner/QPR EnterpriseArchitect client application from QPR Portal with the current QPR Portal user credentials, then enable the option "Login as the current QPR Portal user". This option is useful especially in cloud installations utilizing QPR Common Authentication.
When this option is set, QPR Portal shows next to the "Select model" button in Tools row a button for opening the appropriate client application. The button is shown only if User has a license for the client application assigned in QPR User Management.
When the button is clicked, Portal generates a QPR script that contains information for authenticating the user and opening the current model. Note that the Security Level for executing QPR Scripts must be set to ClientSecurity=3 or 4.
For security reasons this disposable client start script is valid only 5 minutes.