Feedback on: QPR Knowledge Base 2017.1 - Creating and Managing Public BookmarksCreating_and_Managing_Public_BPortal Training Guide > Administrating QPR Portal Content > Creating and Managing Public Bookmarks /Dear Support Staff,
Creating and Managing Public Bookmarks
Exercise 39: Create a Shared Bookmark and Arrange Shared Bookmarks.
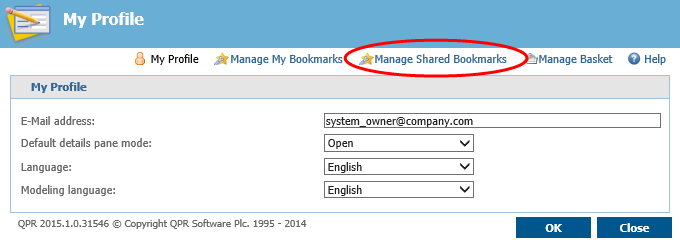
1. In the top right corner of QPR Portal, click Settings.
2. The Settings window opens, click Manage Shared Bookmarks:
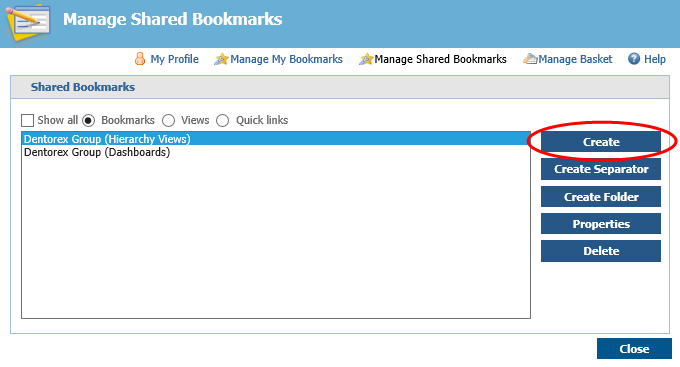
3. Click the Create button:
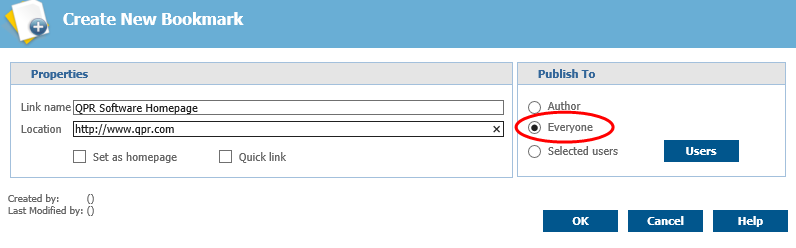
4. The Create New Bookmark window opens. In the Link name field, type "QPR Software Homepage", in the Location field, type "http://www.qpr.com" and make sure that the bookmark is set to be published to Everyone:
5. Click OK.
6. In the Settings window, click the Create Separator button.
7. The Create New Separator window opens. Type in "----- Web Sites -----" as the Separator text, make sure the separator is published to Everyone and click Create.
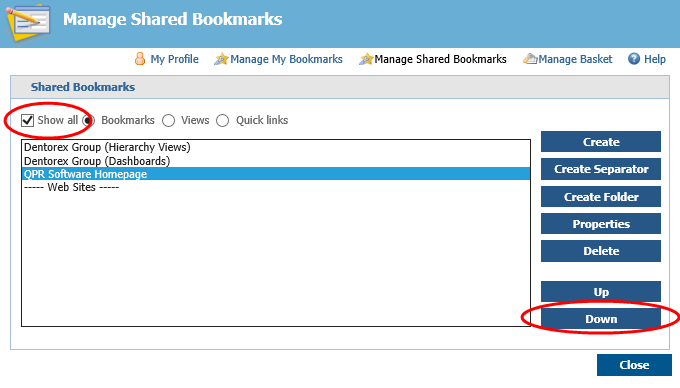
8. In the Settings window, select the Show all check box, and then select the QPR Software Homepage and click the Down button:
9. We'll want to edit the QPR Software Homepage bookmark, click the Properties button.
10. The Modify Bookmark window opens. Change the Link name to "QPR Software Homepage - Contact Information" and the Location to "http://www.qpr.com/contact-us" and click OK.
For more information, see the Settings topic in QPR Portal - User's Guide.