|
|

Installing the Clients package |

|

|

|
||
Installing the Clients package |
|
|
|

|
|
|
Installing the Clients package |
|
|
|
||
Installing the Clients package |
|
|
|
|
|
|
||
Follow the instructions below to install QPR Suite 2017.1 Clients:
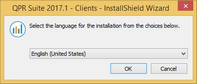
1. Choose Setup Language |
|
Start the installation by selecting the language for the installation wizard from the drop-down list. Note that the software itself may have more languages available (see the packing slip or readme for more details) than what are offered for the installation wizard here. |
|
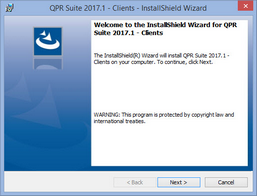
2. Welcome Page |
|
This is the starting point of the QPR Suite 2017.1 Clients installation wizard.
Click Next to continue. |
|
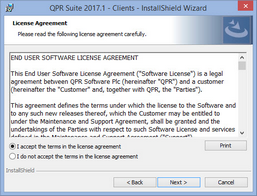
3. License Agreement |
|
Here you can see the End User Software License terms for the software that is about to be installed. You will need to accept these terms before continuing the installation. Select "I accept the terms in the license agreement" and click Next to continue in the case you accept the license terms. Otherwise you'll need to cancel the installation. |
|
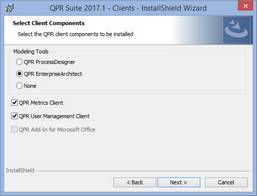
4. Select Client Components |
|
Here you can choose what components are installed. In the Modeling Client section you can choose between QPR ProcessDesigner and QPR EnterpriseArchitect (which cannot be installed simultaneously) or omit both. Additionally, you can select to install QPR Metrics Client. QPR User Management Client, and QPR Add-In for Microsoft Office. Installing the QPR Add-In for Microsoft Office via the clients package is supported for 32-bit versions of Microsoft Word 2010, Microsoft Word 2013, and Microsoft Word 2016. If multiple Microsoft Office versions are found on the computer, a radio button selection is displayed for selecting the target version. For installing QPR Add-In for Microsoft Office for a 64-bit version of Microsoft Office 2010, Microsoft Word 2013, or Microsoft Office 2016, you need to use the QPRAfMOSetup_x64.exe installation package. |
|
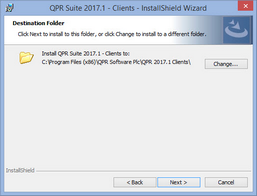
5. Choose Destination Folder |
|
Define the folder which will be the installation root folder for the QPR Suite 2017.1 Clients package. This folder will contain the executables and libraries required to use the software. By default the folder is C:\Program Files\QPR Software Plc\QPR 2017.1 Clients.
Click Next to continue. |
|
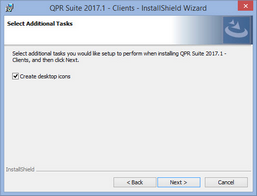
6. Select Additional Tasks |
|
In this dialog you can choose additional features that will be installed. The options available are:
•Create desktop icons. Creates desktop icons for QPR ProcessDesigner, QPR EnterpriseArchitect, and QPR Metrics depending on which of the clients are installed.
|
|
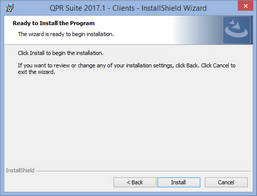
7. Ready to Install |
|
The installer is now ready to start copying the application files to the computer. If you need to change any settings, click Back and make the necessary changes.
Once you are satisfied with the settings, click Install to start the installation. |
|
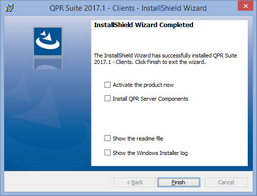
8. Complete |
|
The installation is now complete. Check the "Activate the product now" if you wish to launch the QPR Product Activation Wizard after clicking Finish. Note that the "Activate the product now" option is not available if client components that require activation were not selected to be installed. Similarly, checking the "Show the readme file" checkbox opens the readme file after you click Finish. In addition, if the QPR Suite 2017.1 Servers installation package is present in the same folder as the Clients package, there is the "Install QPR Server Components" option. Selecting that option will launch the Server installer (instructions in the next chapter) when the Finish button is clicked. If you have multiple options selected, the corresponding operations are performed one at a time, i.e. the readme file is displayed after finishing the activation. In installations with also server components included, activation should be done only after all the components are installed, so you cannot select both "Activate the product now" and "Install QPR Server Components" options simultaneously.
|
|
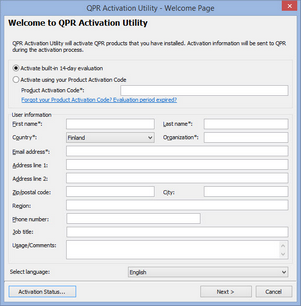
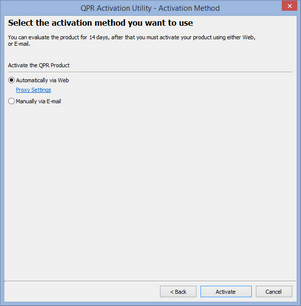
9. Activate the Product |
|||||
In the case you selected the "Activate the product now" option, the QPR Activation Utility is launched and you can activate the software by following the instructions below:
|
|
||||
|
|
||||
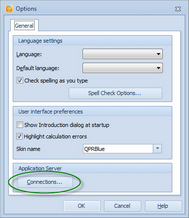
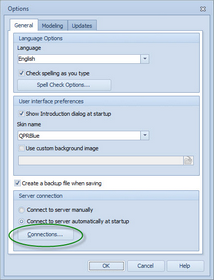
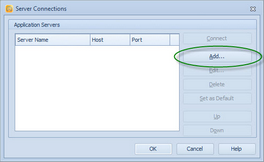
10. Define Server Connection |
|||||||
In case you didn't do a standalone installation where the QPR Servers and Clients reside on the same machine, the server connection needs to be defined for the clients:
|
|
||||||
|
|
||||||
|
|
||||||