Running the Simulation and Studying the Simulation Results |

|

|

|
||
Running the Simulation and Studying the Simulation Results |

|

|

|

|
Running the Simulation and Studying the Simulation Results |

|

|

|
||
Running the Simulation and Studying the Simulation Results |

|

|

|

|
|
|
||
After all the simulation properties have been input, the simulation can be run. Before starting the simulation, close all windows except for the diagram view.
![]() Exercise 89: Run the simulation.
Exercise 89: Run the simulation.
| 1. Open the Simulation - Business Process model. |
| 2. On the Model tab of the ribbon, select Run. The Simulation Options dialog will open. |
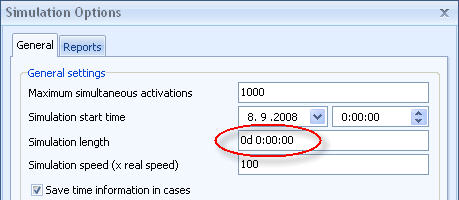
| 3. Set the Simulation length to be 0 days, so there is no limit for the length: |

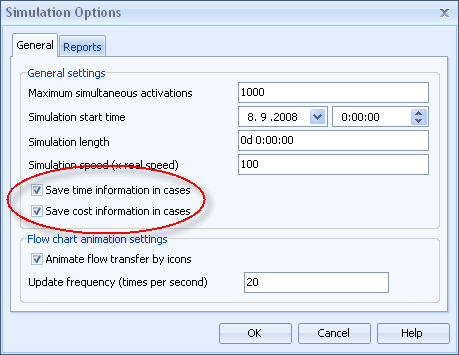
| 4. Make sure the time and cost information calculated during the simulation is saved in cases by selecting the checkboxes Save time information in cases and Save cost information in cases. Each of the activations that start the simulation creates its own case. E.g. if the process is started 100 times during the simulation, cases named Case 1 to Case 100 will be generated: |

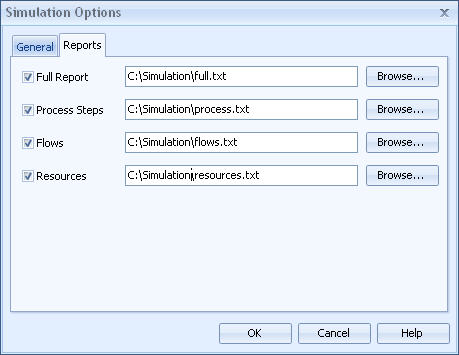
| 5. Switch to the Reports tab and activate all reports. Define the locations of the report files as shown in the picture below: |

| 6. Start the simulation by clicking OK. The Simulation Run dialog is displayed: |

When the simulation is run, the diagrams of the process model are animated. A vertical line shows the processing of a process step and the progress of a flow is shown by animating the transfer type icon of the flow (black dot for flows with no transfer type).
With the Simulation Run dialog, you can stop or pause the simulation run. Also, the speed of the animation can be set during the simulation.
When simulation ends, a dialog box showing the reason for ending the simulation is shown.
![]() Exercise 90: Study the simulation results.
Exercise 90: Study the simulation results.
Note that you need to have run a simulation before the simulation results can be studied.
| 1. On the Model tab of the ribbon, click Reports and select a report type from the drop-down menu. |
For more information, see the Simulation topic and its subtopics in QPR Modeling Client - User's Guide.