Creating a Subprocess |

|

|

|
||
Creating a Subprocess |

|

|

|

|
|
|
||
QPR Modeling Client is suitable for different types of subprocess modeling. Building subprocesses can progress from top to bottom or bottom to top. Visualizing the processes from bottom to top means that the first model is very exact and detailed. After that the subprocesses are created of already finished parts.
![]() Exercise 56: Create process steps and flows, and then combine them into a subprocess.
Exercise 56: Create process steps and flows, and then combine them into a subprocess.
| 1. Open the Creating Subprocesses Exercise model. |
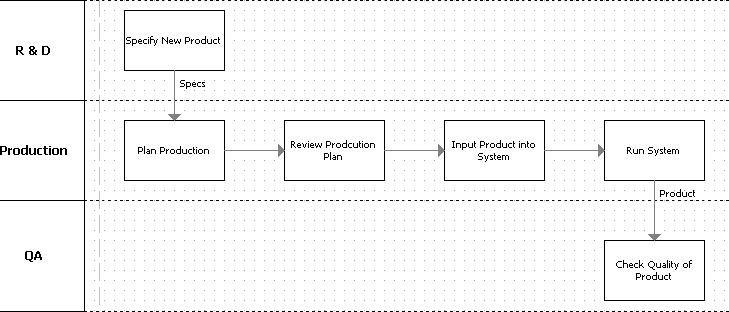
| 2. Create activity process steps and control flows and name them as in the picture below. Connect the Specs flow to the Plan Production process step and the Product flow to the Run System process step by selecting the flow and dragging and dropping the appropriate end to a process step. After this, the model should look somewhat as in the picture below. |

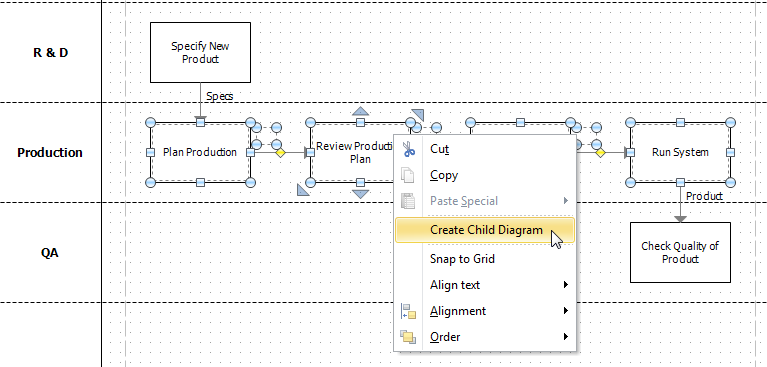
| 3. Select the created process steps and flows either by holding down the shift key and clicking them or by dragging a virtual box around them. |
| 4. Right-click any of the selected flows or process steps to open a popup menu. |
| 5. Select Create Child Diagram from the popup menu. |

| 6. Name the subprocess "Production Line Process". |
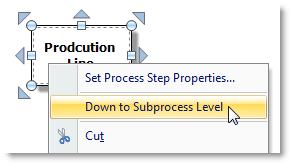
| 7. Go to the child diagram by right-clicking the subprocess and selecting Down to Child Diagram from the popup menu or using the Navigator Frame. |
When the processes are first visualized from the top, you can first create a more abstract model using subprocesses and then add detail by modeling the subprocesses on their own levels.
![]() Exercise 57: Create a subprocess process step and then create process steps inside the subprocess.
Exercise 57: Create a subprocess process step and then create process steps inside the subprocess.
| 1. Create a new model using the Default settings template. |
| 1. On the Tool Palette, select the Subprocess process step. |
| 2. Click on the diagram to create the subprocess process step and name it. |
| 3. Right-click on the subprocess element and select Down to Child Diagram. |

| 4. Create process steps on the child diagram. |
For more information on diagrams, see the QPR Modeling Client - User's Guide.