|
|

Integration View Window |

|

|

|
||
Integration View Window |
|
|
|

|
|
|
Integration View Window |
|
|
|
||
Integration View Window |
|
|
|
|
|
|
||
QPR Metrics has integration capabilities with existing databases and information systems. This is very beneficial for two reasons. Firstly, it means that QPR Metrics can be incorporated into an organization seamlessly and gradually. Furthermore, integration has the added benefit that you can begin using historical data immediately.
You can easily integrate your existing data with QPR Metrics by importing element data from several external data sources. Element data can be imported from files and SQL databases. In file import, you import data from a text-format file. The file must conform to the syntax that the QPR Metrics import function requires. In SQL import, you type an SQL query and execute it either interactively or scheduled. This way, you can specify regular scheduled imports to retrieve data for your elements from a specific SQL database, say, once a week. In addition, replica elements are listed in the Integration View.
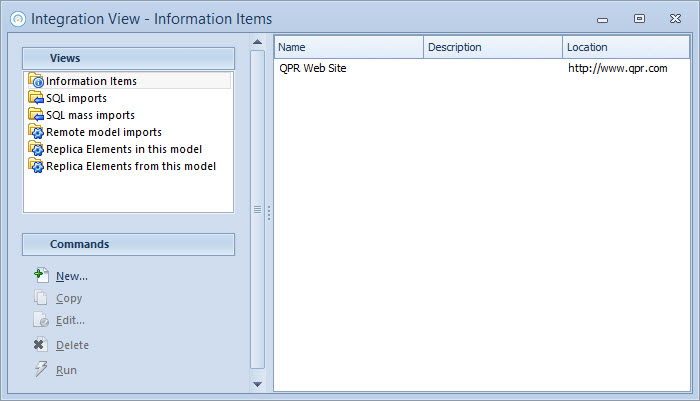
The Integration View is a window where you can work with different kinds of import functions:
To open the Integration View, click the Integration View button on the View tab in the ribbon. In this window, you can perform the following functions:
•Add new items
•Copy items
•Edit items
•Delete items
•Run integration tasks
First, you must select an item type to work with from the Views section of the window. The window and its name change to reflect the item type (Information Items, SQL Imports, SQL Mass Imports, Remote Model Imports, Replica Elements in this model, and Replica Elements from this model). The right section of the window then lists the items in the view.
The Replica elements in this model view lists replica elements that are in the currently open model, whereas the Replica elements from this model view lists the replica elements in other models that replicate elements from the currently open model. The columns on the right section of the window show the following information:
•Original model: the name of the model that contains the original element that is replicated
•Original scorecard: the name of the scorecard that contains the original element that is replicated
•Original element: the name of the original element that is replicated
•Target model: the name of the model that contains the replica element
•Target scorecard: the name of the scorecard that contains the replica element
•Target parent: the name of the upper level element under which the replica element is
•Scheduled: shows whether the replica element has been scheduled to be periodically refreshed
•Last executed: shows the timestamp of the last refresh operation
•Status: shows the outcome of the last refresh operation
Adding New Items
To Add a new item in the Integration view:
| 1. | In the Views section, select the item type you want to add. |
| 2. | Click the New... button. The window for defining the item opens. |
| 3. | Define the item and click Close. |
Note that replica elements cannot be created in the Integration View. See the Copies/References Window topic on how to create replica elements.
Editing Items
To edit an item in the Integration view:
| 1. | Select the item type you want to edit from the Views section. |
| 2. | Select the item you want to edit in the list. |
| 3. | Click Edit. The window for the settings of that item opens. |
| 4. | Make the changes you want and click Close. |
Copying Items
To copy an item in the Integration view:
| 1. | Select the item type you want to copy from the Views section. |
| 2. | Select the item(s) you want to copy in the list. |
| 3. | Click the Copy... button. |
| 4. | In the case the new copy requires additional information such as target element and series, views for selecting the desired information are shown before the copy is created. |
Note that replica elements cannot be copied in the Integration View.
Deleting Items
To delete an item in the Integration view:
| 1. | Select the item type you want to delete from the Views section. |
| 2. | Select the item you want to delete in the list. |
| 3. | Click Delete. The item you selected is removed from the window. |
Running Integration Tasks
To run any selected integration task (i.e. an import or a replica element refresh, not an information item):
| 1. | Select the task type you want to run from the Views section. |
| 2. | Select the task you want to run from the list. |
| 3. | Click Run. The task is now performed in the background. |
In addition, you can right-click any integration task and select Run from the pop-up menu to perform the task.
Note: The Run command is supported only for integration tasks using server data sources.
Handling Multiple Tasks
You can also process multiple integration tasks simultaneously. You can select multiple items by selecting them with the Ctrl key pressed down. You can select a range of items by clicking the first and the last item in the with the Shift key pressed down all the time. After multiple items have been selected, you can right-click over the selection to open a pop-up menu which contains options for creating new tasks, editing tasks, deleting tasks as well as running tasks. Some of the options may not be available for all types of integration tasks.
Tip: The information items list and the replica elements list can be sorted to ascending or descending order according to one of the columns. To re-sort the listing, click the column title you wish to use as a sorting criteria. To reverse the sort order, click the same column title again. The selected sort order will remain for as long as QPR Metrics is restarted.