Periods Window |

|

|

|
||
Periods Window |

|

|

|

|
|
|
||
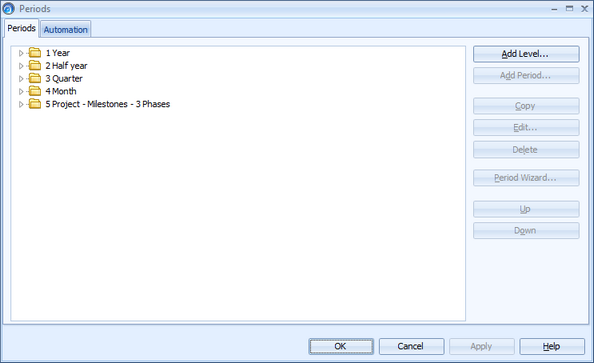
In the Periods window you can work with the period levels, add new periods either manually or automatically with the help of the Period Wizard and automation rules, copy periods, and edit and delete them.
To open the Periods window, click the Periods button on the on the Model tab of the ribbon.
Working with Period Levels
See Working with Period Levels.
Adding a New Period
To add a new period:
| 1. | Select the period level to which you want to add the period. |
| 2. | In the Periods tab, click the Add Period... button. The Add Period window opens. |
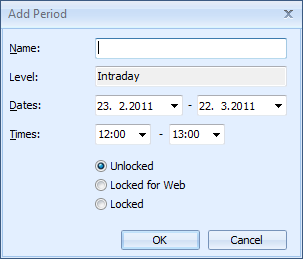 |
| 3. | Type the name of the period in the Name field. |
| 4. | The period level is visible in the Level field. |
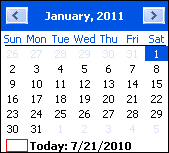
| 5. | Select the start and end date from the Dates drop-down calendars. |
 |
| 6. | If the period is an intraday period, select the start and end time from the Times drop-down menus. However, it is recommended to use Period Wizard or Automation Rules for creating intraday periods. |
| 7. | Select whether the period is Unlocked, Locked for Web, or Locked. See the Period Lock section below for description about the options. |
| 8. | Click OK. The new period is added to the list in the Periods window. |
Period Lock
If a period is Unlocked, values belonging to the period can be altered in QPR Metrics client and in QPR Portal.
If a period is Locked for Web, values belonging to the period cannot be altered in QPR Portal.
If a period is Locked, values belonging to the period cannot be altered neither automatically nor manually. This means, that in QPR Portal the values are not editable in any edit modes no matter what user rights the user has. In QPR Metrics client, this means that values of the type "Value is typed in" or "Value is typed in (restricted)" are not editable and they are never recalculated and status options of locked periods cannot be changed in any way. In addition, changing the locked values using QPR API or SQL import/mass import or QPR Web Services Foundation is not possible.
If a Locked period is unlocked later or it is changed to Locked for Web, recalculation is not performed automatically right away. Instead, the values are recalculated when the recalculation is triggered next time.
A user with at least model administrator rights can override the locking. This can be done by forcing the recalculation of the value or by typing in a new value in QPR QPR Metrics.
Toggling Period Lock is available only for users with at least model administrator rights.
Copying a Period
To copy a period:
| 1. | In the Periods tab, select the period you want to copy. |
| 2. | Click the Copy button. The period is copied into the list. The new period is named after the original period with the addition of an incremental number after the name. |
Editing a Period
To edit a period:
| 1. | In the Periods tab, select the period you want to edit. |
| 2. | Click the Edit... button. The Edit Period window opens. |
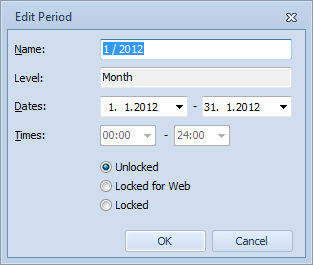 |
| 3. | Make the changes you want and click OK. The new settings are saved. |
Deleting a Period
To delete a period:
| 1. | In the Periods tab, select the period you want to delete. |
| 2. | Click the Delete button or press the Delete key and a confirmation dialog will appear. Confirm the deletion by clicking the Yes button and the period will be deleted from the list. |
Period Wizard
You can also define periods easily by using the Period Wizard.
Defining Automation Rules
In the Automation tab you can define rules for automating creation, locking, and deletion of periods.
To add a rule:
1.In the Automation tab, click the Create Rule button.
2.Define a name for the rule into the Rule name field.
3.In the Action field, select whether periods should be created, locked, locked for web, or deleted.
4.Triggering level controls when the automation is run as well as the time span for which the periods are created, deleted or locked (see examples below). This needs to be the same or a longer period level than target level. Note that the triggering period level needs to have existing periods for this to work.
5.The Delay in days field defines how many days before or after the start or end of triggering level the rule is run. Define the amount of days and then select one of the options in the drop-down box.
6.In the Target level field, choose the period level the rule applies to. This needs to be either the same or a lower level than triggering level.
Example:
•Action: Create periods
•Triggering level: Year
•Delay in days: 1 before period start
•Target level: Month
Outcome: On December 31st 2010, all month level periods are created for year 2011.
Example 2:
•Action: Lock periods
•Triggering level: Week
•Delay in days: 3 after period ends
•Target level: Week
Outcome: Period for the previous week is locked in the third day of the current week.
Running Automation Rules Manually
While the automation works based on calendar, you can also run the rules manually to verify their functionality. To run all defined automation rules:
1.In the Automation tab, click the Run Rules button.
2.The Automation Dates window opens:
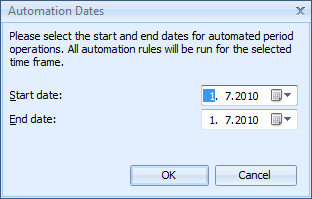
3.Define the Start date and End date.
4.Click OK. All rules that are valid for the defined time period are run. Some rules may be run multiple times if their triggering conditions are met multiple times within the defined timeframe.
See Also