|
|

User Properties Window |

|

|

|
||
User Properties Window |
|
|
|

|
|
|
User Properties Window |
|
|
|
||
User Properties Window |
|
|
|
|
|
|
||
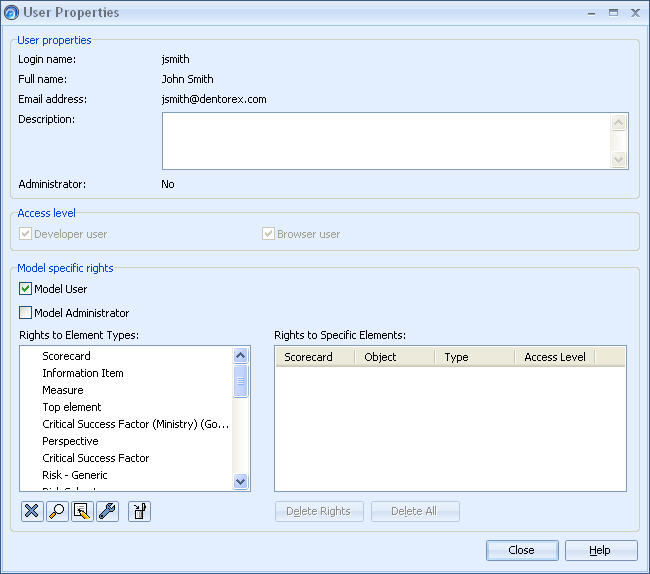
In the User Properties window and the Group Properties window, you can set the model element rights levels for the selected user or model element rights levels for the selected user group.
User Properties
The User Properties section shows the user's login name, full name, e-mail address, description and whether the user is a user of the model or an administrator. All these properties except for model user/administrator are set in the QPR User Management System and cannot be modified from within QPR Metrics.
In the Access level section you can see what QPR Metrics components the user has rights to. There are two possible classes of user: Developer user and Browser user. These rights are defined in the QPR User Management Client. By checking either or both of the fields, you will enable the user to log into the corresponding QPR Metrics component. One user can belong to both groups simultaneously. A QPR Metrics administrator has always unlimited user rights to the entire model and has the task to set the rights for other QPR Metrics users and user groups.
The selected user type will appear next to the user's name in the "Type" column of the User Rights window. The user type will appear as an abbreviation (D = Developer user, B = Browser user, A = Administrator M = Model User).
In the Model specific rights section you can set the general rights to model elements, define whether the user has administrative rights for the model and see a list of all the element specific rights.
A user can be granted rights for using the model by checking the Model User checkbox. Removing the check mark from the checkbox prevents a user from using the model.
The QPR Metrics administrator can also give a user administrative rights to the model. This can be done by checking the Model Administrator checkbox. If the user who is made a model administrator is logged in at the moment the rights are granted, they will get them when they log in the next time. When a user is a model administrator, all the other user rights settings become disabled as administrators have automatically unlimited rights to the model.
In the Rights to Element Types section you can set the general rights for the available classes of model elements. To set general rights, select a model class (e.g. Scorecard, Information Item, etc.) and then click one of the following buttons to assign the required rights level:
|
None |
|
View |
|
Update |
|
Full |
For example, if you want to give the user "Bob" full rights to all of the scorecards of the model then select the "Scorecard" class on the list, and click the Full rights button ![]() .
.
For information about how user rights work with specific modeling items, such as Layout Templates, Measurement Units, etc., see User Rights to Other Modeling Items.
Once these general level user rights have been set, you can proceed to set rights to specific object and branches of the model from the Model Navigator and Scorecard Navigator. If any object rights have already been set for the current user, then these will appear in this "Rights to Specific Elements" list. You can delete individual rights from the list by selecting the desired rights and clicking the Delete Rights button. Delete All removes all rights to specific elements.
Administrator User Properties
The User Properties window for administrators is otherwise similar to that of normal users, but the general and specific object rights cannot be set as administrators have unlimited access to all elements.
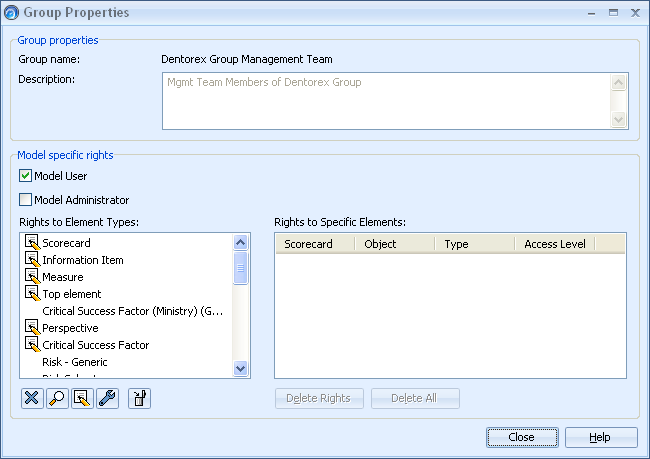
Group Properties
The Group Properties window shows the group's name, description and the user rights. The name and description are set in the QPR User Management System and cannot be modified from within QPR Metrics, but the user rights are defined in this window.
In the Model specific rights section you can set the general rights to model elements, define whether the group has administrative rights for the model and see a list of all the element specific rights.
The QPR Metrics administrator can also give a group administrative rights to the model. This can be done by checking the Model Administrator checkbox. If members of the group that is made a model administrator are logged in at the moment the rights are granted, they will get them when they log in the next time. When a group is a model administrator, all the other user rights settings become disabled as administrators have automatically full rights to the model.
In the Rights to Element Types section you can set the general rights for the available classes of model elements. To set general rights, select a model class (e.g. Scorecard, Information Item, etc.) and then click one of the following buttons to assign the required rights level: ![]() None,
None, ![]() View,
View, ![]() Update, or
Update, or ![]() Full.
Full.
For example, if you want to give the group "Marketing Unit" full rights to all of the information items of the model then select the "Information Item" class on the list, and click the Full rights button ![]() . Now if Marketing Unit has Update rights to a certain element (note: these are "specific object rights"), then the group members can create, edit and delete information items for that element.
. Now if Marketing Unit has Update rights to a certain element (note: these are "specific object rights"), then the group members can create, edit and delete information items for that element.
For information about how user rights work with specific modeling items, such as Layout Templates, Measurement Units, etc., see User Rights to Other Modeling Items.
Once these general level user rights have been set, you can proceed to set rights to specific object and branches of the model from the Model Navigator and Scorecard Navigator. If any object rights have already been set for the current group, then these will appear in this "Rights to Specific Elements" list.
Once you have finished setting the user/group's properties, click the Close button to return to the User Rights window.