|
|

Model Navigator Frame and Tool Palette |

|

|

|
||
Model Navigator Frame and Tool Palette |
|
|
|

|
|
|
Model Navigator Frame and Tool Palette |
|
|
|
||
Model Navigator Frame and Tool Palette |
|
|
|
|
|
|
||
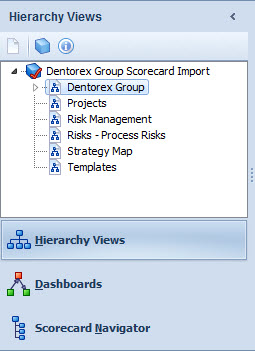
In the Model Navigator frame, models and their elements are presented hierarchically using a tree-like structure with the following symbols:
|
A model which is currently open. |
|
A model which is currently closed. |
|
An imported model which is currently closed. |
|
An archived model which is currently closed. |
|
A scorecard. If the name of the scorecard is highlighted in red, it means that the scorecard contains at least one element with at least one erroneous formula. Note that this behavior depends on whether the "Highlight calculation errors" setting is enabled in QPR Metrics Options. |
|
An information item. |
|
A collapsed branch. Click to expand. |
|
An expanded branch. Click to collapse. |
Click the ![]() button in the Scorecards section to show all models and templates on the Server. Click the
button in the Scorecards section to show all models and templates on the Server. Click the ![]() button in the Scorecards section to display also information items of the current model in the hierarchy. Double-clicking a model will open it.
button in the Scorecards section to display also information items of the current model in the hierarchy. Double-clicking a model will open it.
Browsing the hierarchical structure of models is simple: just expand and collapse branches. You can also refresh the contents of the tree by pressing the F5 button.
Creating Elements and Shapes with the Tool Palette
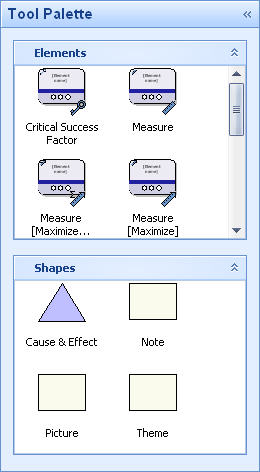
Elements can be easily created with the help of the Tool Palette. To add an element either to the Scorecard Navigator, Hierarchy Views, or the Dashboards, simply select the desired element from the Elements section and drag-and-drop the element into the correct position in the target view. In the Hierarchy Views and the Dashboards you can also add elements as view instances by drag-and-dropping them with the Ctrl key held down.
Similarly, you can add Shapes to the Hierarchy Views and the Dashboards by selecting the desired shape from the Shapes section and drag-and-dropping it into the view.
Pop-up Menu of the Tool Palette
Right-clicking an element type or a shape type opens a pop-up menu, which allows you to open the Element Type Window or the Symbol Layout Window to define the element type properties, shape type properties, and the default symbol layout of the element type or shape type.
Pop-up Menu of the Model Navigator Frame
Right-clicking a tree element in the Model Navigator frame opens a pop-up menu, which allows you to edit the tree elements and add new elements, among other things. The contents of the menu varies according to tree element you have clicked.
For more information on the pop-up menu, see Model Navigator Pop-up Menu.
Creating Scorecards and Information Items
To create a new scorecard or an information item, click the right mouse button to open the pop-up menu and select Create New ![]() Scorecard or Create New
Scorecard or Create New ![]() Information Item. A new scorecard can be created also by pressing the Insert button or by clicking the
Information Item. A new scorecard can be created also by pressing the Insert button or by clicking the ![]() button, which creates a new scorecard under the currently selected one in the hierarchy.
button, which creates a new scorecard under the currently selected one in the hierarchy.

See Create a New Scorecard and Create a New Information Item for more information.
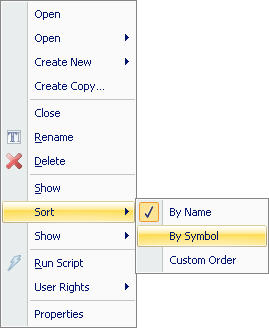
Sorting Scorecards
To sort scorecards in the hierarchy, select the Sort item from the pop-up menu of the hierarchy tree. There are three sorting options available:
| 1. | By Name (default). When this option is selected, scorecards of the same hierarchy level are automatically sorted in an alphabetical order. If there are scorecards with the same name, they are sorted by their identifiers. |
| 2. | By Identifier. When this option is selected, scorecards of the same hierarchy level are automatically sorted in the alphabetical order of their identifiers. |
| 3. | Custom Order. When this option is selected, scorecards are not sorted automatically. However, you can sort scorecards by dragging and dropping them on their parents – if a scorecard is dragged by the mouse and released over its parent, it is moved as its last child in the hierarchy. You can also move scorecards and information items freely to different locations in the hierarchical structure. Grab the item which you want to move with the left mouse button, drag it to the new location and release the mouse button to drop it there. |
The sorting order set this way is saved to the QPR Metrics Server and applied to the scorecard hierarchy of the current model. The scorecard navigation frame of this model in QPR Portal uses the same sorting order too.
Deleting and Renaming Scorecards and Information Items
If you want to delete an information item, right-click an item and select Delete from the pop-up menu. Answer Yes to the confirmation dialog and the item will be deleted. To delete a scorecard, select the desired scorecard in the hierarchy and press Delete. Alternatively, select Delete from the pop-up menu.
To rename a scorecard, right-click a scorecard displayed in the tree and select Rename from the pop-up menu. The name of the scorecard will turn into an input field where you can enter the new name. Press the Enter key to confirm renaming or Esc key to cancel the operation.
Tip: Instead of selecting Delete from the pop-up menu, you can press the Delete key on your keyboard.
Editing Properties of Scorecards and Information Items
To view or edit a scorecard or an information item, double-click its name on the Model Navigator frame. Depending on the currently selected perspective, the corresponding view will open in the Viewing frame or, if you clicked on an information item, an Information Item Window will appear. To change the perspective, press the view buttons on the bottom of the Model Navigator Frame.
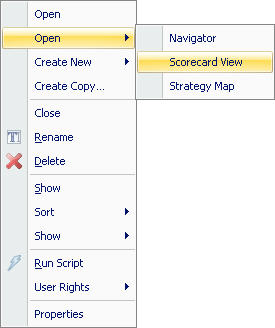
If you prefer opening a separate viewing window, click the right mouse button on top of the scorecard you wish to see. Then select perspective from the sub-menu Open of the pop-up menu, i.e. Navigator, Hierarchy Views, or Dashboards.
Note: You can view all elements of any model with the Scorecard Explorer, if you have sufficient rights to those elements. However, you cannot edit other elements than the ones which are part of the model that is currently open.